
The outlet not working breaker not tripped is a situation you may meet once in your life because every electrical device needs to connect to the electrical grid by outlets.
Therefore, it is crucial to understand the case of an electrical outlet not working. Let’s find out why and standard solutions to fix this issue.
Reasons Why Outlet Has Power But Doesn’t Work?
There are many factors contributing to problems in which the outlet stopped working. You should check and determine the exact reasons to know how to resolve this case and make the outlet operate again.
Damaged Wire
When one outlet or multiple outlets has power but is not working, you first need to consider wiring. Wires are the only way electricity provides energy for your outlets in the whole house, and it is the only way power from your outlet activates your electrical appliances.
A damaged wire can not allow current to get to outlets, and the transmission of current may be cut off. Therefore, you must check your wires when this electrical problem happens and know which part of the wire was damaged.
It is straightforward to know whether the wire was spoiled because of a burn mark, cracked insulation, a sound of buzzing, or some critical signs like that.
Loose Connection
Transmission of current can be interfered with by loose connections. By strong hauling the wire at the sockets in outlets, you can easily find loose connections.
The main reason for loose connection may be wear and rear on outlets. If you want to know the situation of connectors or conductors, you have some tools and professional skills. However, if you need help with what to do, the best way is to call a professional.
Tripped CFCI
CFCI is a ground fault circuit interrupter that can beak the circuit whenever there is an imbalance between incoming and outgoing electricity. It helps protect users stay away from electric shock and protect their equipment from overload or electrical fire destroying whole things.
But there are, few people know about this device and how it operates. Then, when CFCI does its task, the electricity supplied to outlets will be impeded until you turn it on. First, however, you need to find out why the GGCI tripped. If not, it can be tripped many times in the future.
Dead Wall Outlet
A broken outlet can be a common reason. Like any electrical device or appliance, all outlets have an expiry date. However, if you use one outlet very frequently, it can wear out before the expiration date.
And, someday, it will stop working, and you can fix-up. But, there is a day it died ultimately. Therefore, if your house and your electrical systems were built many years ago, it is time to replace some outlets, for example.
Burn Out Outlet

Because of electrical overload, short circuits, or loose wiring, your outlets can be burned out and stop working. You can identify this reason with some simple signs like high temperature, small fires, or sparkles inside outlets.
Poor Wiring
This is often the case with self-installed circuits without the assistance of expert electricians. They need to gain professional skills and knowledge to wire perfectly and effectively.
Many wires matched in a non-technical way can lead to faulty wiring or defective wiring that electricity supply can not reach outlets because it is easy to have some wrong wire and wrong terminals which prevent transmission of electricity.
Half-Hot Outlet
The final reason for not working outlets is a half-hot outlet with duplex outlets. It has one plug, and it is “on” permanently, whereas another one is turned on or off by a switch.
How To Find Out Reasons For Outlet Stopped Working Breaker Not Tripped?
So, how to identify why the multi-outlet or individual outlet stopped working beaker not tripped? There are four steps you can take to check out and find out the reasons for your problems.
Check Your Wall Outlet
Suppose you cannot use an electrical outlet, test to see if power is supplied to the walls. A voltage pen, sometimes known as a tester pen, is a low-cost and effective tool.
Once you’ve confirmed that our outlets are dead, you may proceed to the following step.
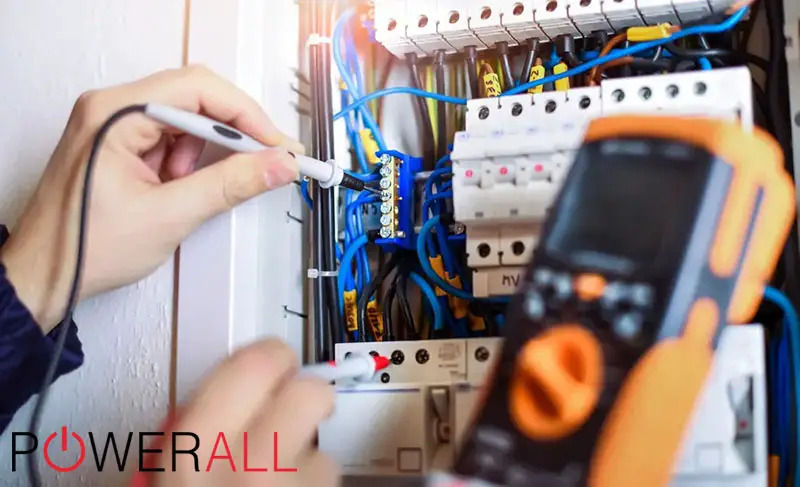
Examine The Breaker Switches
When electrical outlets cease working, you should examine the circuit breakers to see if any have tripped.
If the circuit breakers guarding the malfunctioning outlets haven’t already tripped, do so now, wait a few moments, and then turn them back on—an issue with the cable or equipment protected by the tripped breaker.
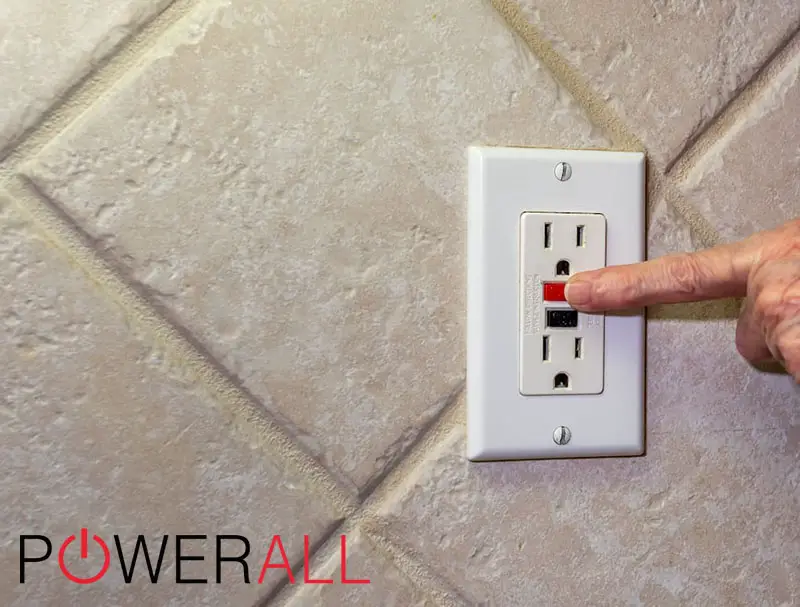
Examine the GFCI Outlets
GFCI (Ground Fault Circuit Interrupter) outlets provide an extra layer of safety and may also trip/switch off in certain circumstances.
If this occurs, find the restart button and return it to the outlet to restore power.
Unless the GFCI outlet keeps tripping without any load connected in, then the GFCI outlet itself may be defective.
Note: If just one GFCI outlet is connected to the electrical circuit, a tripped GFCI outlet will prevent electricity from reaching the other outlets. A tripped GFCI outlet will also prevent electricity transmission.
Check Alternative Sources
Whenever one power outlet is lifeless, and the circuit breakers and GFCI outlets are functional, examine additional outlets to determine whether they are also dead.
After determining which ones have electricity and which others do not, one may more precisely identify the electric issue, mainly if the home wiring diagram is provided.
After locating the source of the problem, one may address it more simply or seek help, such as from an electrician.
How To Repair Outlet Stopped Working Breaker Not Tripped?
The circuit breaker has not been tripped when a single or several outlets fail to provide electricity. This indicates that there are a few checks that should be made to narrow down the potential causes and find a solution as soon as feasible.
Restart A GFCI Outlet
If your beaker is not tripped, and you can not use outlets. Before restoring the whole electrical system, you may reset the GFCI.
However, you have to ensure your safety because without being careful, you can even die because of electrical shock. Therefore, all gadgets connected to the circuit must be unplugged or turned off.
An audible “click” should result when pressing the Test button. The grounding fault using an inductive has been triggered if the switch does not make a clicking sound. Repeat the “Reset” option until you get a click. Once you plug anything into this outlet, all subsequent outlets and lights should get electricity. If the GFCI continues to trip after you click the reset button, the underlying issue may still be active.
If this is the case, you should turn off the lights and remove any appliances (such as space heaters) connected to the same network in issue before attempting to reset the GFCI immediately. The circuit breaker for the damaged circuit must be turned off before the GFCI may be reset.
The need for a professional electrician may arise if the GFCI won’t restart (or resets immediately) even after the power goes off across the whole home.
Fix Bad Connection
Let’s pretend that you’ve already checked the breakers and attempted to restart the GFCI, but you’re still having trouble getting power back to the offending outlet. Perhaps a power outlet is malfunctioning in one room. However, the circuit breaker has not yet been tripped. Nonetheless, there is still a possibility that one room is without electricity. The next step is to remove the outlet from the wall and inspect the wiring for loose connections. There are primarily three types of flexible connections to look for when just one outlet is malfunctioning:
- Unsecured screws on the terminals
- Loose connections are made by stabbing them in.
- Slack in the wires at the various junctions
When you take out your outlet and look in the outlet box, you can find one, two, or perhaps all three of these connectivity issues.
Check For Loose Wires
- In the first place, examine the screw connections for damaged or frayed wires.
- The wire should be bent gently at each screw termination. Loose wiring may be detected if the wire can be turned beneath the screw or if the screws can be moved.
- Examine the screws and wires to see whether they are rusted, damaged, or scorched.
- If the outlet’s connection is loose, it should be replaced.
- The terminals of the ground, neutral, and hot cables must be looped together before you install the new outlet.
- Please use the brass screw for the live wire, the silver screw for the neutral wire, and the green screw for the ground.
- Wind the wires clockwise around the screws, and then screw them down.
- Beneath one wire connection, connect the two sets of hot and neutral cables (which should be under all four screws) to a third, six-inch piece of wire.
- Finally, attach the slack ends of the pigtails to the screws on the appropriate outlets.
The Repair of Loose Cables At Stab-In Connections
Some electricians shorten the wiring process by inserting wires that have been stripped via holes in the back of the outlet. While this wiring technique does not violate any regulations, unsecured wires might eventually cause fires or shocks. Here’s what you should do to solve it:
- Consider checking for stabbed-in connections while you investigate the non-working outlet.
- If you want to be sure that your wires aren’t dangling, give them a little pull.
- You shouldn’t merely re-insert the wire into the socket if you find a loose connection. Instead, attach the wire’s end to the screw terminal after cutting and stripping it.
Aluminum wire is far more dangerous than copper wiring, so be sure to hire a specialist if you need any repairs done.
Pulling On Connecting Wires To Ensure They’re Not Loose
Here’s how to detect slack by pulling on it.
- You must switch off the main breaker.
- Grab the end of the wire splice.
- Carefully tug on each cable in the bundle to identify any that may be disconnected.
- The connection for the wire in question should be detached if you find a loose wire.
- Disassemble the wire harness by cutting and stripping all of the wires. Half an inch to three-quarters of bare copper wire should be seen.
Putting Back The Connector
Here’s how to reconnect the wires:
- The instructions for connecting wires should be read from the package they came in.
- The wires must be gathered, their ends aligned, and a new write connection must be twisted onto them. Be careful to turn it in a clockwise direction.
- Restart the power supply by switching the main breaker back on.
- Check the outlets once again to determine if the issue persists.
But what if the issue isn’t with the wiring? Perhaps the breaker may be the only broken part of the system.
Switching Out A Faulty Circuit Breaker
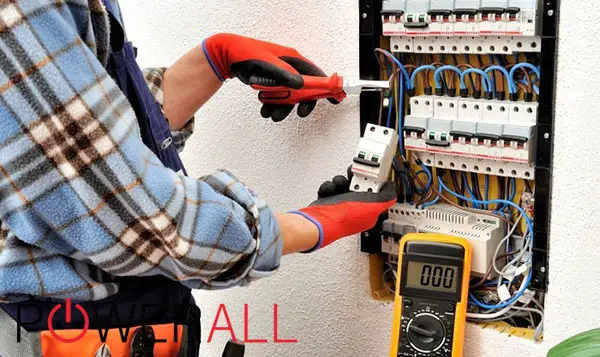
Any time your breaker often trips (or doesn’t trip when it should), becomes too hot to the touch, or won’t reset, it’s time to get a new one. If you don’t feel comfortable doing the replacement yourself, it’s best to call in a licensed electrician. You don’t want to be in a position where the breaker isn’t tripped, and the electrical outlets need to be fixed all the time.
The following items should be available if you need to replace a circuit breaker but not supplying power to the outlet.
- Replace the breaker with a new one, but get one of the same specific brand, model, manufacturer, and size.
- A soundproof place to put your feet down
- Having your flashlight, screwdriver, and cable strippers
- Connectors for cables
- The detector of electric currents
If the outlet has ceased functioning, but the breaker has not been tripped, you will need to replace the breaker as follows:
- Deactivate each circuit breaker.
- Then, you should shut off the main breaker.
- Ensure that all cables are working correctly by using the voltage tester. Before continuing, you must ensure that all wires have been completely severed.
- The panel cover must be removed.
- Pull the wire from the breaker’s load terminal.
- The old breaker has to be prayed out.
- Carefully insert the replacement breaker into its new home.
- To the load terminal, connect the wire.
- Restore the panel cover and tighten any dangling terminals.
- Flip the main breaker to turn on the branches.
- The use of a voltage tester is recommended.
Whether the issue persists after you have replaced the breaker, check each device in the home to see if it is receiving electricity. In case that doesn’t work, call an electrician.
FAQ:
Is An Outlet Possible To Fail Without The Breaker Or A Blown A Fuse Being Tripped?
An outlet can become dead without causing the circuit breaker to trigger. A tripped breaker is only one possible source of this; other possibilities include broken electric breakers, faulty wiring, unsecured connections, and so on.
Such issues may be resolved, but take all precautions to ensure your safety.
For What Reason Might A Plug-In Suddenly Cease Functioning?
Electricity has been cut off for whatever reason (a tripped breaker, a broken breaker, a damaged wire, a loose wire, a poor connection, a malfunctioning connector, etc.).
Conclusion
There are many reasons for the electrical outlet stopped working breaker not tripped, and we already provide you with some standard solutions that you can use to resolve this electrical problem.
However, if you do not have any skill and do not ensure that your actions can or can not bring about dangerous situations, please call professional electricians for electrical issues to avoid electric shock injuries or accidental fires.


0 Comments