If you have an uncharged battery due to prolonged inactivity or improper maintenance, normal tools fail to save it. In this case, there is nothing better than a reconditioning charger that applies advanced technology to breathe new life into your item. So what is battery reconditioning on a charger? Scroll down for details.
What Does Battery Recond Mean?
A reconditioning charger is essentially a regular charger, but the built-in microprocessor increases its usage. Advanced technology regulates current and voltage levels and assesses battery health during charging. As a result, your battery does not suffer from overcharging under close supervision.
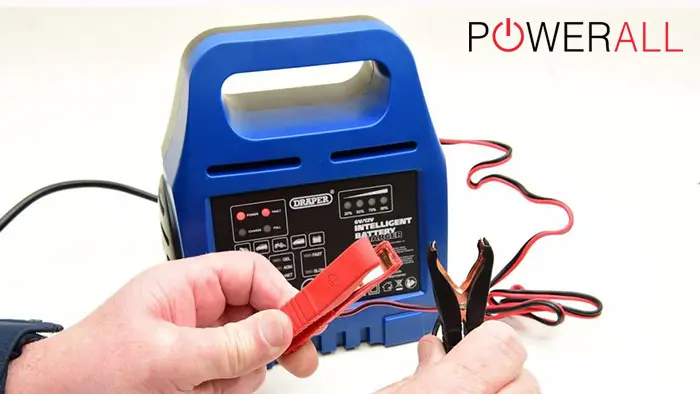
Besides, this tool also saves lives of already-overcharged batteries. In contrast to conventional types, it reverses the chemical reaction and prevents crystal formation on the electrodes.
You can also use it for battery recovery, as its name suggests. Reconditioning mode automatically activates when the battery cannot be successfully charged. The system provides a constant and steady current until the cells are electrically balanced with the electrolyte solution.
The principle behind this process develops from three events:
- Desulfurization
- The sulfur deposit at the atomic level employing a low-frequency signal
- Resolution into the electrode
The smart charger monitors and calculates to decide between simple charging or reconditioning. It then removes the sulfur crystals that accumulate on the electrode in every individual cell to restore the integrity of the components. After completing the task, the charger goes into maintenance mode, also known as the floating mode, to conserve power.
An important note is that not all chargers offer this particular mode. It would help to verify what functions are available before investing in one.
Three Features Of Battery Reconditioning Chargers
Built-In Regulator
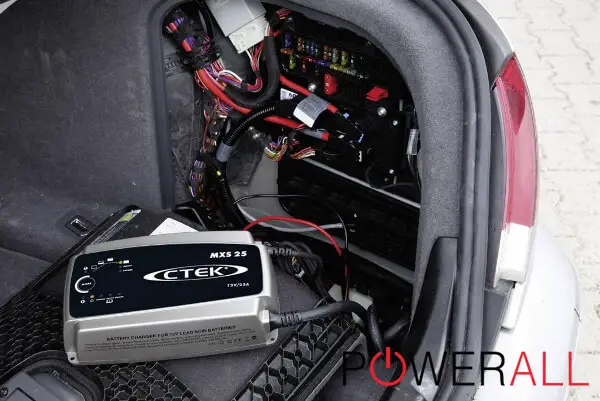
Hundreds of microprocessors act as the brains of the charger. Based on the artificial intelligence program, the smart system monitors the voltage and current of the battery and translates the results to complex input algorithms.
It then assesses the calculations and gives the output. This signal triggers the reconditioning charger to perform the appropriate functions to establish power supplies.
Dissolves Crystals
As mentioned above, this is the most important function distinguishing smart chargers from standard tools. Only this option can send small frequencies to break down the sulfate on the electrodes.
Once again, integrated microprocessors play a key role. They deliver certain signals that break the bonds between solid sulfate crystals. This way, the ions separate and dissolve into the electrolyte. The release of free radicals causes the cells to operate at full capacity, thus rejuvenating your battery.
Voltage And Current Readings
This feature comes first as the groundwork for the two above. Simply put, a reconditioning charger with good sensitivity can make accurate readings and calculations about the current state of the battery. The output of this task transforms into the key input for the microprocessor to work.
Some modern chargers even display amperage and voltage while the battery is charging. Hence, you do not have to invest extra money in a voltmeter or ammeter when you have such an all-around right-hand man.
Why Should You Try Battery Reconditioning?
Environmentally Friendly
According to statistics from the US Environmental Protection Agency (EPA), the country endures more than 2.9 million tons of solid waste from lead-acid batteries annually. This massive volume equates to 19 pounds of garbage per resident.
Worse, these products release harmful chemicals that contaminate the soil or water if not handled properly. Now consider, on a global scale, how huge burdens our earth is bearing.
On the bright side, humans can reduce this number correctly, and one of these is to “repair” the batteries instead of throwing them away. When microprocessors revive an old battery, one less is thrown in the landfill.
Your actions have contributed to saving the planet. If more people are united for this good purpose, the effect spreads to a greater extent.
Money Savings And Earning
A saved battery saves you some money on a new replacement. Remember that quality products can cost you hundreds of dollars.
The best part, however, is the birth of a potential business idea – rejuvenating the batteries and selling them to the market. A study of consumer insights shows that some cannot be patient with manual actions and potential hassles. This group is willing to pay if your service meets the value they seek.
You do not need to ask for a license or mechanic certificate for this job. It is a side business that grows based on your skill and patience.
Longer Battery Lifespan
The battery age is significantly reduced due to repeated overcharging. The root of the problem comes from a lack of supervision. Fortunately, it is unnecessary to babysit this process because smart chargers are already responsible.
The smart processors conduct the charging process in a controlled manner. Even with a long connection time, your battery does not suffer major damage.
The same principle applies to undercharging. Proper care certainly prolongs the lifespan of your component.
Preventive Maintenance
Even the best reconditioning charger fails to save batteries from excessive corrosion because of heavy material loss in the internal structure. Remember that prevention is always better than cure. You should add a smart charger to your maintenance routine from the beginning.
The tool performs its sulfur dissolution function once a month. This procedure maintains performance and restores original capacity. An efficient and long-lasting battery is better than a dire situation where it fails to start your car.
Ease Of Use
Some people have safety concerns about working with smart chargers to achieve the benefits listed above. Lift the pressure off your feet; this device is safer than conventional options.
Manufacturers have set up an automated process. Protection is guaranteed due to its anti-sparking and short-circuit-proof nature. The reverse polarity also comes into play if you accidentally install the wrong connections.
In short, these features promise safety for the battery and the owner, though car maintenance or repair cannot be completely free of risks.
How Does A Reconditioning Charger Save Your Battery?
Now that you have grasped the science behind the battery recondition, it is time to dive into the details with seven simple steps.
Desulfurization
As the name suggests, the charger dissolves sulfur through a low-frequency signal. The precipitated molecules decompose slowly and convert to ions. They then come in contact with hydrogen and oxygen to regenerate into sulfuric acid. It is also the first stage of waking up dead batteries.
Slow start amperage
Your battery has completed the repair work and entered the recharge phase. The charger builds the first solid premise by delivering 50% of the current. This is necessary to avoid overcharging.
Maximum current
As soon as the system receives positive feedback on the inrush current, the charger delivers 100% of the high current to the battery. This condition continues until the capacity reaches 75-80%.
Stable amperage flow
For the remaining 20% capacity, the smart charger reduces the current flow rate and charges slowly until full. Switching back and forth between fast and slow charging ensures close monitoring of the battery’s response to different voltages and power sources.
Test
The built-in voltmeter reads voltage and charging status. The system reverts to slow charging if the battery has not reached 100%. Once the battery meets the criteria, the charger proceeds to the next steps.
Steady current to carry out recondition
The charger maintains a steady low current to the battery continuously, which becomes a catalyst to trigger reverse chemical reactions at the battery plate. After a while, the electrode and electrolyte reach equilibrium in charge. That is also when the battery fully wakes up and works with stable performance.
Floating mode
The charger maintains a charging level of 100% without putting any stress on the battery. So you do not have to worry about overcharging issues if you forget to disconnect.
Reconditioning A Lead Acid Battery Yourself
Essential Items
Materials:
- Epsom salt
- Baking soda
- Distilled water
Tools:
- Protective gear (chemical-resistant gloves, safety goggles, and apron)
- Battery charger
- Voltmeter/multimeter
- Bucket and funnel
- Flathead screwdriver
- A toothbrush or steel wool
Step-By-Step Tutorial
Step 1: Put on safety gear and measure the battery voltage
Do not make any contact with the battery before wearing protective gear. Sulfuric acid electrolytes leave serious wounds if they get on your skin or clothing.
Now, thoroughly examine your car battery by a visual check. Any signs of physical damage, such as bloating, leaks, or cracks, mean no further steps are needed. Instead, replace it with a new battery.
If the situation goes well, assess the possibility of reconditioning by measuring the voltage. Bring the voltmeter close to both terminals. The results should be between 10-12.6 volts.
Step 2: Mix the cleaning solution
Mix distilled water and baking soda in 1:2 to get a paste. If it is too thick, try a 1:1 ratio. Do not use tap water or other substitutes, as trace minerals or other undesirable substances may harm the battery.
The solution is used as a cleaning agent and neutralizer for acid spills in the following steps. If you do not have the two key ingredients for the solution, purchase a battery terminal cleaner.
Step 3: Clean the corrosive battery
Disconnect the cables, first with the negative terminal – the black power cord and then the positive terminal – the red one. Pay attention to traces of corrosion and dust.
Pour the prepared mixture into these areas and scrub with a toothbrush. Exert more force on cable connectors and terminals for efficient energy transfer afterward.
Wipe out the solution and any remaining mess with a cloth. All components must be dry before moving on to something else.
Step 4: Remove the battery acid
Standard car batteries usually have six cells; you must uncap them all. If you own a sealed part, use a flathead screwdriver to remove the cover and cap underneath.
Approach the sulfuric acid inside with extreme care. Lift the battery and pour fluids into the tank. Prepare 500 grams of baking soda and pour it into the bucket to neutralize the acid. This measure is necessary to ensure the safety of disposal.
Step 5: Clean the battery cells
Pour in the baking soda solution to fix spills. Then, fill a funnel with the solution on top of the battery compartments. Close the lid and shake the battery for 30 seconds to 1 minute. After a few turns, open the cover again and pour the fluids.
Step 6: Prepare the electrolyte
Mix 120g of Epsom salt with 1 liter of water to obtain an electrolyte with a molar concentration of 1. You can warm the distilled water to dissolve the salt crystals faster. Fill each cell, close the cap, and shake well as above.
Step 7: Charge the battery
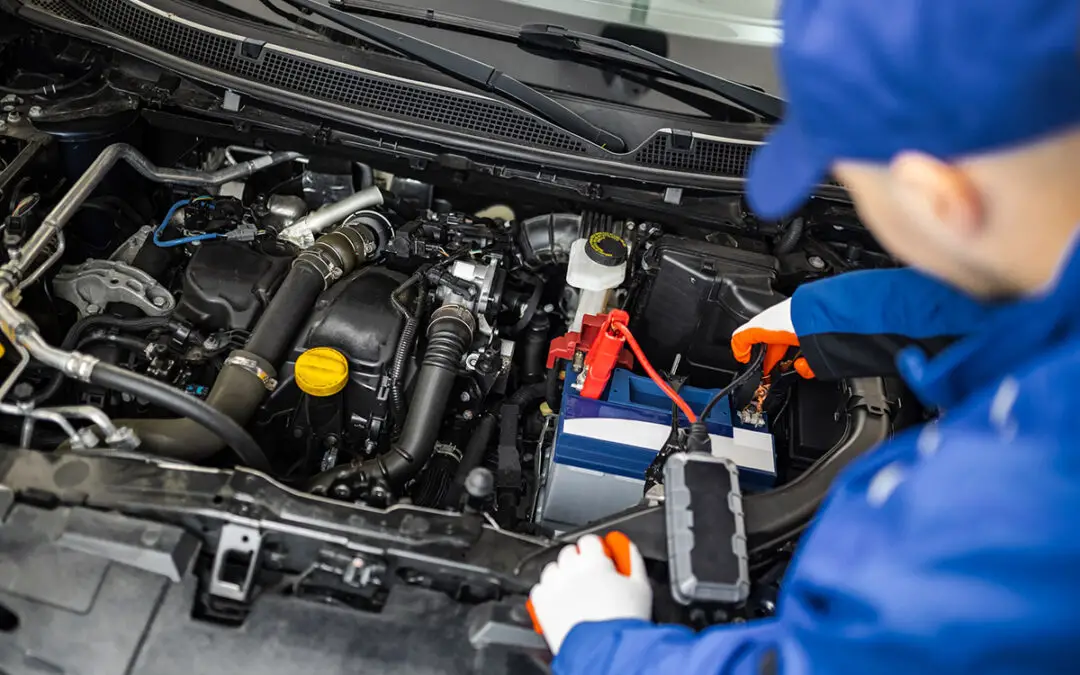
Put the battery in a safe place and attach it to the charger – red cable first, then black. Remember to remove the battery cover as a precaution. The electrolyte solution may heat up and spill out. If you leave the opening, you face a high risk of explosion.
Keep as much distance as possible between the charger and the battery. Set the lowest current level, for example, 12V / 2 amp, and let the battery be charged for 24-36 hours.
Disconnect from the terminals and use the voltmeter to measure the output. If the reading shows less than 12.42 volts, repeat this step for another 12 hours.
Step 8: Check the voltage and loading
Put the battery cover back and reinstall the battery in the vehicle. Now perform a profile load test using the following two actions:
- Turn the ignition to “ON” and turn on the high beam lights
- Use a voltmeter to read voltage. Your effort has paid off if the reading runs between 10 and 12.6 volts.
Note that this measure hides dangerous risks. It is best to take advantage of the battery load testers instead.
FAQs
How Long Does It Take To Recondition A Battery?
The working time varies from 12-36 hours, depending on your battery size, overall condition, charger, input voltage, etc.
When Should And Should Not I Recondition A Battery?
You should perform a battery recondition when the capacity is reduced by 30-40%. However, this measure cannot be effective in the following cases:
- The battery has undergone three or more reconditions before.
- It was physically damaged or corroded.
- Your item has lost part of its plate due to sulfation.
- You have not prepared enough necessary materials and equipment for the entire process.
Do Recondition Battery Chargers Work?
Absolutely, yes. Except for the heavy damage, the reconditioning charger comes to save your batteries from death.
What Is The Difference Between Reconditioning And Recharging?
Recharging means filling the battery to its current capacity in a short period. Meanwhile, reconditioning brings the product back to its full capacity as original.
How Long Do Reconditioned Batteries Last?
The battery life may increase to 10 years or even longer thanks to a successful recondition. You may be surprised that its average lifespan is usually only 5 years.
Conclusion
One thing is certain: battery charger reconditioning mode is handy to save your component from death. However, it is best to utilize this marvelous tool in your routine at the beginning of your battery. It makes your life easier with a fast and safe charging process. Now it’s time to find a high-quality product to support your auto parts.






0 Comments