
Knowing how to test a circuit breaker and how they function can save your life because they are the electrical system’s core foundation.
You should become knowledgeable about using a digital multimeter to check a breaker. Learning ways to accomplish that will allow you to perform simple repairs without hiring an expert, sparing you both money and energy.
What Is A Circuit Breaker?
A circuit breaker is a type of electrical device often used to guard against faulty wiring, overloads, and overcurrents that could harm an electrical appliance. It is an autonomous electrical safety device in its most basic form.
A single breaker is connected to each circuit in an electrical panel box, often known as a “circuit box.” However, these parts eventually acquire flaws; thus, it’s essential to safeguard your device.
Tools You Will Need For Testing A Circuit Breaker With A Multimeter
In regulating your electrical supply system, your circuit breaker is crucial. The energy that enters your property is split up into several circuits, each of which is linked to a breaker.
A major electrical fire problem or potential fire hazard results from electrical overload, which occurs when the current amount exceeds the highest safe level for the equipment it is meant for. When this current overloading happens, the circuit breaker disables its connections, cutting off power to the device.
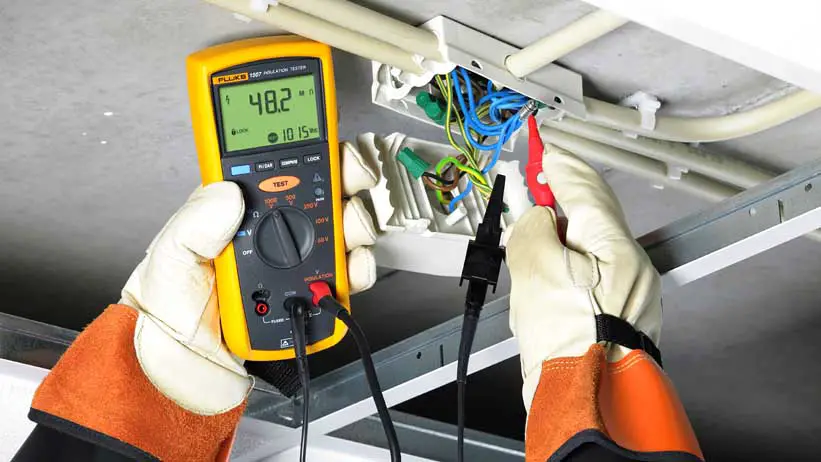
You may find out how much energy is flowing through the breaker panel or breaker terminal by testing a circuit breaker with a multimeter
You’ll need the following equipment to test your circuit breaker:
- Digital Multimeter
- Safety gloves
- A flathead screwdriver
The brand you choose is less significant than making sure your multimeter is set to the correct setting to prevent damage. Knowing the appropriate setting for your application is crucial to avoid damaging the multimeter or electrical issue.
Different Methods On How To Test A Breaker
A digital multimeter can be used to examine your circuit breaker in two different methods.
Voltage Checks
The circuit breaker’s voltage is easily reachable on the board. Because you will be working with live power, you need to exercise extreme caution. Your breaker may not work properly if the voltage reading is 0 or lower than the recommended level.
Analyze The Resistance/ Resistance Testing
Using your multimeter to test the resistance of a breaker can also reveal a malfunctioning one. This procedure is highly suggested for testing circuit breakers before installing them in your system. This method is more secure because you don’t require live electricity to evaluate breakers.
How To Test A Circuit Breaker With A Multimeter: Voltage Checks
Make sure to disconnect any electronics and switch all off lights connected by the breaker you are going to deal with before you start. Wear safety gloves and a pair of footwear with rubber soles afterward.
Step 1: Open The Circuit Breaker Box/ Circuit Breaker Cover
The flathead screwdriver you have should be used to loosen the circuit protection panel cover. You’d better grip it before removing the final screw. To avoid having your circuit protection box drop, it is best to have a little help when opening it.
Step 2: Change The Multimeter’s Setting To AC Voltage
Set your multimeter’s scale to Voltage level, then connect the red and black testing leads to the appropriate socket terminals on the main and power output sockets.
Remember that some digital meters need to be set to the proper frequency. If so, set the multimeter’s scale to a voltage greater than what you currently see (usually 120V). You can move to the following step after properly configuring your equipment.
Step 3: Perform A Circuit Breaker Test
You must connect your black wire or common wire to the circuit board’s ground to verify your electric circuit breaker’s power output. Place your red line next to the piece of wire of the breaker you want to check. A single pole circuit breaker should display a value of about 120V.
Your measuring device’s red and black leads must be directly coupled to the breaker socket to measure a 220-volt double pole breaker. You need to test each double pole breaker; the result should be approximately 240 volts. If the second end of your double pole circuit breaker is zero, the circuit breaker is faulty, and you need to get a new one.
How To Test A Circuit Breaker: Analyze The Resistance
If you want to measure a single pole breaker’s resistance, turn your multimeter to the resistivity or ohms values. Next, connect one lead to the source terminal or clamp the other to the terminal screw end. When you switch the circuit on, it must read as having resistance, and then when you turn that off, there should be no rating.
When testing a double pole breaker, apply the same process. Your circuit breaker has to be changed if it lacks resistance when powered on or disappears completely when shut off.
Conclusion
Did you find this article about testing a circuit breaker with a multimeter helpful? By figuring out what is broken with your bad circuit breaker before contacting an expert, checking your switch will help you save cash.
Whatever the case, any of the mentioned methods is helpful. By taking the steps above each one at a time, you can save money and avoid hiring a qualified electrician to fix your faulty circuit breaker.
See also:


0 Comments